Wednesday, January 21, 2015

How to delete/eliminate the "conduit search malware"

Lesson 3: Using Process Explorer to Troubleshoot and Diagnose

SysInternals 3
Understanding how Process Explorer’s dialogs and options work is all fine and good, but what about using it for some actual troubleshooting or to diagnose a problem? Today’s Geek School lesson will try and help you learn how to do just that.

Not that long ago, we started investigating all sorts of malware and crapware that gets installed automatically any time you don’t pay attention while installing software. Nearly every piece of freeware on the market, including the “reputable” ones, are bundling toolbars, search hijacking awfulness, or adware, and some of it is hard to troubleshoot.
We’ve seen many computers from people that we know that have so much spyware and adware installed that the PC barely even loads anymore. Trying to load the web browser, especially, is nearly impossible, as all of the adware and tracking software competes for resources to steal your private information and sell it to the highest bidder.
So naturally, we wanted to do a bit of investigation into how some of these work, and there’s no better place to start than the Conduit Search malware that has claimed hundreds of millions of computers worldwide. This nefarious awfulness hijacks your search engine in your browser, changes your home page, and most annoyingly, it takes over your New Tab page no matter what your browser is set to.
We’ll start with looking at that, and then we’ll show you how to use Process Explorer to troubleshoot errors that talk about locked files and folders that are in use.
And then we’ll round it out with another look at how some adware these days are hiding themselves behind Microsoft processes so they appear legit in Process Explorer or Task Manager, even though they really aren’t.

Investigating the Conduit Search Malware

As we mentioned, the Conduit search hijacker is one of the most persistent, awful, and terrible things that nearly every one of your relatives probably has on their computer. They bundle their software in shady ways with any freeware they can, and in many instances, even if you select to opt-out, the hijacker will still be installed.
Conduit installs what they call “Search Protect”, which they claim prevents malware from making changes to your browser. What they don’t mention is that it also prevents you from making any changes to their browser unless you use their Search Protect panel to make those changes, which most people won’t know about since it’s buried in the system tray.
Not only will Conduit redirect all of your searches to their own custom Bing page, it will set that as  your home page. One would have to assume that Microsoft is paying them for all this traffic to Bing, since they are also passing some ?pc=conduit type of arguments in the query string.
Fun fact: the company behind this piece of garbage is worth 1.5 Billion dollars and JP Morgan invested $100 million into them. Being evil is profitable.

Conduit Hijacks the New Tab Page… But How?

Hijacking your search and home page is trivial for any malware — this is where Conduit steps up the evil and somehow rewrites the New Tab page to force it to show Conduit, even if you change every single setting.
You can uninstall all of your browsers, or even install a browser you didn’t have installed before, like Firefox or Chrome, and Conduit will still manage to hijack the New Tab page.

Somebody should be in jail, but they are probably on a yacht.
It doesn’t take much in terms of geek skills to eventually deduce that the problem is the Search Protect application running in the system tray. Kill that process, and suddenly your new tabs open just the way the browser maker intended.

But how, exactly, does it do this? There are no add-ons or extensions installed into any of the browsers. There aren’t any plugins. The registry is clean. How do they do it?
This is where we turn to Process Explorer to do some investigation. First, we’ll find the Search Protect process in the list, which is easy enough because it is properly named, but if you weren’t sure, you can always open up the window and use the little bulls-eye icon next to the binoculars to figure out which process belongs to a window.

Now you can simply select the appropriate process, which in this case was one of the three that run automatically by the Windows Service that Conduit installs. How did I know that it was a Windows Service that restarts it? Because the color of that row is pink, of course. Armed with that knowledge, I could always go stop or delete the service (though in this particular case, you can simply uninstall from Uninstall Programs in Control Panel).
Now that you’ve selected the process, you can use the CTRL + H or CTRL + D shortcut keys to open the Handles view or the DLLs view, or you can use the View -> Lower Pane View menu to do it.
Note: in the world of Windows, a “handle” is an integer value that is used to uniquely identify a resource in memory like a window, an open file, a process, or many other things. Each open application window on your computer has a unique “window handle”, for example, that can be used to reference it.
DLLs, or dynamic link libraries, are shared pieces of compiled code that are stored in a separate file to be shared among multiple applications. For instance, instead of having every application write their own File Open / Save dialogs, all applications can simply use the common dialog code provided by Windows in the comdlg32.dll file.
Looking through the list of handles for a few minutes brought us a little bit closer to what was going on, because we found handles to Internet Explorer and Chrome, both of which are currently open on the test system. We’ve definitely confirmed that Search Protect is doing something to our open browser windows, but we’ll need to do a little more research to figure out exactly what.

The next thing to do is double-click the process in the list to open up the details view, and then flip over to the Image tab, which will give you information about the full path to the executable, the command line, and even the working folder. We’ll click the Explore button to take a look at the installation folder and see what else is hiding there.

Interesting! We’ve found a number of DLL files here, but for some weird reason none of these DLL files were listed in the DLL view for the Search Protect process when we were looking at it earlier. This could be a problem.


Any time you want to see whether a DLL file is currently being used by any application on your system, you can pop up the search pane by going to the Find menu, hitting CTRL + F, or just clicking the binoculars icon on the toolbar. Now type in part of the name of the DLL, or even the full name if you’d like.
We chose to search for just the beginning, “SPVC”, since that was the common tie between them all, and sure enough, it looks like those DLLs are being loaded directly into each of the browser processes running on our computer.

Clicking on one of the items in the list and switching over to the Threads page confirmed what we were worried about. Both Chrome and Internet Explorer were running threads using the SPVC32.dll or SPVC64.dll files from the Search Protect malware, and this is how they were hijacking our new tab page — not by changing settings, but by hijacking the browser from within.
Note: In Windows, a thread is what the operating system allocates processor time to run. A process in Windows is what we’re used to thinking of as geeks and system admin types, but technically threads are actually the only thing that runs in Windows, not processes. Certain processes may have only one thread of execution, but others may have many threads that are all running separately from one another, usually communicating with some sort of in-process communication mechanism.
You can also double-click on any of the threads to see the full execution stack, which can be useful to see what functions are being called and attempt to figure out what the problem is.

You might be wondering how the Search Protect application managed to get Google Chrome to load that DLL, and the answer is that Windows provides a feature called DLL Injection. A process can inject a DLL into another process, and then hijack certain API functions. This is how certain applications override Windows features or features in other applications. It’s a very complicated subject that we definitely can’t get into in this lesson, but if you really want to read more, you can check out this guide.
It’s also worth noting that you can see the CPU usage per thread by digging into this level of details, which can be very useful when troubleshooting an application that has plugins. You could use this to figure out that a particular DLL file is taking up too much of the processor time, and then do some research on what that component belongs to.

Dealing with Locked Files or Folders

Since it’s unlikely that you’ll be investigating malware all the time, it’s also helpful to use Process Explorer for other tasks, like dealing with those “In Use” dialogs that you can any time you try to delete or move or modify a file or folder that is being used by another process, especially when you aren’t sure what process is locking it up.

When you get an error like that one, just head over to Process Explorer, open up the search with CTRL + F or the icon, and then type in the name of the folder listed above (or more descriptive full path if the name is very vague).
You’ll very quickly see a process in the list that has your file or folder open, and you can double-click on it to identify the process in the list.

Your immediate reaction might be to just close that process, but you don’t necessarily have to do that. You can also right-click on the file or folder in the list of handles (Use the CTRL + H option to bring up the Handles list) and choose the Close Handle option. That resource is now unlocked!

Note: If you’re deleting something, this is a perfectly fine option, but if you are just trying to edit or move that item, you should probably open the offending application and deal with it there so you don’t lose any data.

Researching Processes that Look Safe but Aren’t

During our malware research we’ve noticed another problem that is becoming more prevalent, so it is wise to keep an eye on it in the future. What is that problem? Malware is hiding behind legitimate Windows processes, and it’s doing a good job.
The problem is the Windows rundll32.exe utility, which can be used to arbitrarily run functions from DLL files. Since this utility is signed by Microsoft it shows up as a completely legit process in the list, but in reality what they are doing is just moving all of their malware / adware code into a .DLL file instead of a .EXE file, and then loading up the malware with rundll32.exe instead. In fact, if you see rundll32.exe running as an “own process” in the light blue color shown below, it’s nearly always something that shouldn’t be running.
In the example below, you can see that even though we used the Verified Signer feature to validate that item, when we hover over it and look at the full path, it is actually loading up a DLL that turns out to be part of an adware product.
Note: before you start screaming about running an anti-virus scan, we’ll note that we did, and it didn’t come back with anything. Much of this crapware, adware, and spyware is ignored by anti-virus utilities.

Double-clicking to open up the details shows more of the problem, and we can also see the directory that the badware is running out of, which we’ll use to investigate further.

Inside that directory we found a number of files that were being updated constantly in the background.

The rest of the investigation led into some other tools that weren’t SysInternals, and that we’ll probably cover at a later date, but suffice it to say that this is just a piece of malware that was running in conjunction with another crapware application.
The important point here is that malware is able to hide itself behind legitimate Windows executables, so be sure to keep your eyes peeled for anything similar.

Coming Up Next


Stay tuned tomorrow for even more SysInternals knowledge, as we show you how to use the Process Monitor utility to track what applications are actually doing behind the scenes. It’ll be eye-opening.

credit to url http://www.howtogeek.com/school/sysinternals-pro/lesson3/all/

How to Remove Trovi / Conduit / Search Protect Browser Hijack Malware
How to Remove Trovi / Conduit / Search Protect Browser Hijack Malware


If your computer has been hijacked with an obnoxious malware that won’t let you change your home page, there’s a strong chance you’ve been infected with the Trovi Search Protect malware, which used to be known as Conduit. Here’s how to remove it.
RELATED ARTICLE
Why We Hate Recommending Software Downloads To Our Readers
Windows software downloads are a mess. Many programs try to drag adware and other malicious junk onto your computer. Even... [Read Article]
How do you know this is malware? Instead of installing like it should, as a Google Chrome Extension, you’ll probably see that your extensions list doesn’t mention Trovi or Conduit at all. Instead, they are hijacking the browser process using Windows API techniques that no legitimate application should be using. For more details on that, you can read our series on using Process Explorer to troubleshoot Windows.

How Did You Get Infected?

Usually at some point you made the huge mistake of trusting a site like Download.com, which bundled it into an installer for a completely different application. This is why you should be really careful when downloading freeware on the Internet.

They get around the legality issue with their long terms of service that nobody reads and by making sure there’s actually a way to uninstall the thing. But as far as we’re concerned, anything that installs in a sneaky fashion and hijacks your other running processes is malware.

Removing the Trovi Search Protect Malware

This is really sad to say, but it’s actually important to use the Search Protect panel to turn off the bad settings first before uninstalling it. You can find the Search Protect icon in the system tray and then double-click on it to open up the panel.

In here, change your Home Page back to Google or whatever you want.

Now change your New Tab page back to Browser Default.

Change your Default Search back to “Browser default search engine.”

And then uncheck the “Enhance my search experience,” which is a lie, because it doesn’t enhance it at all.

Now head to Control Panel, find the Uninstall Programs section, and then find Search Protect and click the Uninstall button. While you are in here, you might want to uninstall anything else that says anything similar to “Search Protect.” If you see SaveSense, remove that too.

At this point your browser should be back to normal… but we aren’t done quite yet. There are still a lot of traces of this thing that we need to clean up.

Use the Google Chrome  Software Removal Tool

If you are using Google Chrome, you are in luck because Google provides their own Software Removal Tool to make sure that all of these things are removed. Just head to the Google SRT page, download and run it, and it will automatically detect and remove everything.

Once you start up your browser again, it will ask if you want to reset your browser settings. This will reset everything to defaults, including removing all troublesome extensions. It’s probably a good idea, although note that you’ll have to login to all of your sites again.

Download the Software Removal Tool from google.com

Clean Up IE Settings

If you are using Internet Explorer, you should go to the Tools menu and find the Manage Add-ons item. In here, you can click on Search Providers and change your search back to what it should be. If you see Trovi in the list, click on it and then click Remove.

Use Malwarebytes to Scan Your PC

All of the above techniques will get your computer back to normal — at least as far as Trovi is concerned. But there’s a very strong chance that you’ve got other things hijacking your browser and spying on you.
The best bet for cleaning up spyware and malware is Malwarebytes. You might ask yourself why you wouldn’t just use your regular antivirus product, but the fact is that antivirus just doesn’t detect spyware very often. It’s only useful for viruses that try to destroy your PC, which are few and far between at this point. Almost all of the malware out there is trying to spy on you, redirect your browsing, and insert more ads into pages that you’re viewing. It’s all about the money.
So the only really good product on the market that will find and remove spyware, adware, and other malware is Malwarebytes. Luckily they have a free version that will let you clean up and remove everything — if you want to pay for the full version that has active protection to prevent these things from happening, that’s fine too.
Once you’ve downloaded and installed it, you’ll be prompted to run a scan, so click that big green Scan Now button.

After it completes scanning, it’ll find a big huge list of things to remove. Click the Apply Actions button to actually remove all the malware.

You’ll want to reboot your computer to make sure that everything is fully cleaned up. If anything seems to come back, run Malwarebytes again, remove anything found, and then reboot again.

retrieved from url:http://www.howtogeek.com/198386/how-to-remove-trovi-conduit-search-protect-browser-hijack-malware/

Sunday, January 18, 2015

Recently RELEASED by Mexican Athorities, Ancient Artifacts (PROOF of ALIENS)


Published on Nov 28, 2014
High Resolution for full screen viewing. "Pause" for further study.

While many will not consider this solid Proof, it's only because of their own blindness and unwillingness to accept the obvious. To them I would ask the following questions, Why would these people leave such documentation? Why such stories in stone? Remember the phrase "It's not written in stone"? Well, this is, and it was hidden for decades, from their discovery. Why do you suppose that is?

Ancient Aliens on Mars: Curiosity Spotted Carved Animal Statue and Strange Artifacts


Monday, January 12, 2015

140,000 Year Old UFO Discovered – The Baltic Sea Anomaly


Manual for Installation of Voice over the Internet Protocol (VoIP)

Manual for Installation of Voice over the Internet Protocol (VoIP)


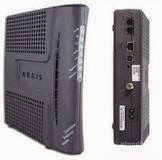
Arris TM502G Phone/EMTA Modem.

Introduction
The following manual can be used to set up “VoIP” in each of the following system: ATT VoIP, Xfinity VoIP. Also, it could be used in any type of device that uses the technology (Voice over Internet Protocol) and has a phone line available. The installation requires a medium level of expertise and understanding of telephone wiring to complete this task.
Warning:
Failure to follow each of the steps; might result in an unsuccessful activation of your phone service. In the case of alarm set up, it could result in the creation of an isolation network where you alarm system is completely disconnected from the telephone network.

What is VoIP?
VOIP is an acronym of the phone service identified as “Voice over Internet Protocol”. (Communications technology for carrying voice telephone traffic over data network such as the Internet. VoIP uses the Internet Protocol (IP)-one half of the Transmission Control Protocol (TCP/IP), a global addressing system for sending and receiving packets of data over the Internet.
VoIP works by converting sound into a digital signal, which is then sent over a data network such as the Internet. The conversion is done by a device, such as a personal computer (PC) or special VoIP phone, that has a high-speed, or broadband, Internet connection. The digital signal is routed through the network to its destination, where a second VoIP device converts the signal back to sound. Because of the digital nature of VoIP, call quality is normally much higher than that of a standard telephone. Another advantage is that VoIP frequently costs less than standard telephone and long-distance service.) VoIP. (2014). In Encyclopaedia Britannica
What is EMTA?
EMTA is an acronym to the term “Embedded Multimedia Terminal Adapter”. This is a combination of cable modem and telephone adapter.
Glossary of Terms:
The following types of wires are currently found in old and new constructions and their proper identification is necessary to properly connect them:


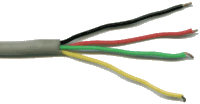
Cat3: Heavily used in the 90’s for wiring homes and offices. As a result it is still present in old homes.


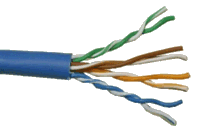
Cat5: Their usage commenced around the year 2000. It is the standard cable used in offices and homes.


Illustration of how to connect cat5 to cat3.


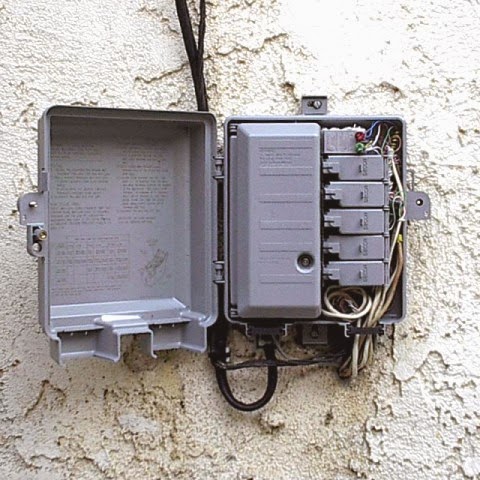
NID: Acronym for “Network Interface Device”. It is always located next to your power line meter equipment.


Scotch lock (use to connect and splice phone wires).


Network Interface Device (also referred to as EBM by technicians).


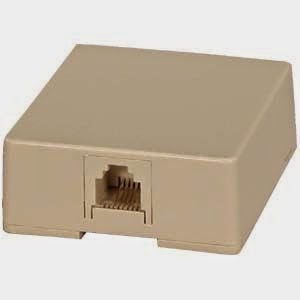
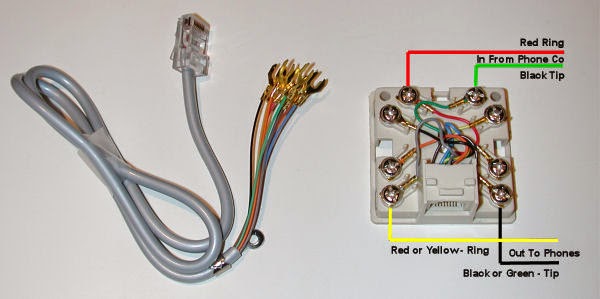
RJ11 Modular Single Port Surface Mount Jack.

List of required tools/equipment:

·         EMTA (embedded multimedia terminal adapter) Modem with line1 for dial tone services
·         1 Box Cat-5e
·         1 3M scotch lock hand crimping tool with step jaws and long nose /crimping pliers
·         50 units Scotch lock “gel filled” 3 port connectors
·         1 Wire striper
·         1 Flat #1 screw driver
·         1 Phillip #1 screw driver
·         1 Professional scissors for wires
·         Tone generator line tracer tester tone with amplifier probe kit
·         But-set and a modular adapter


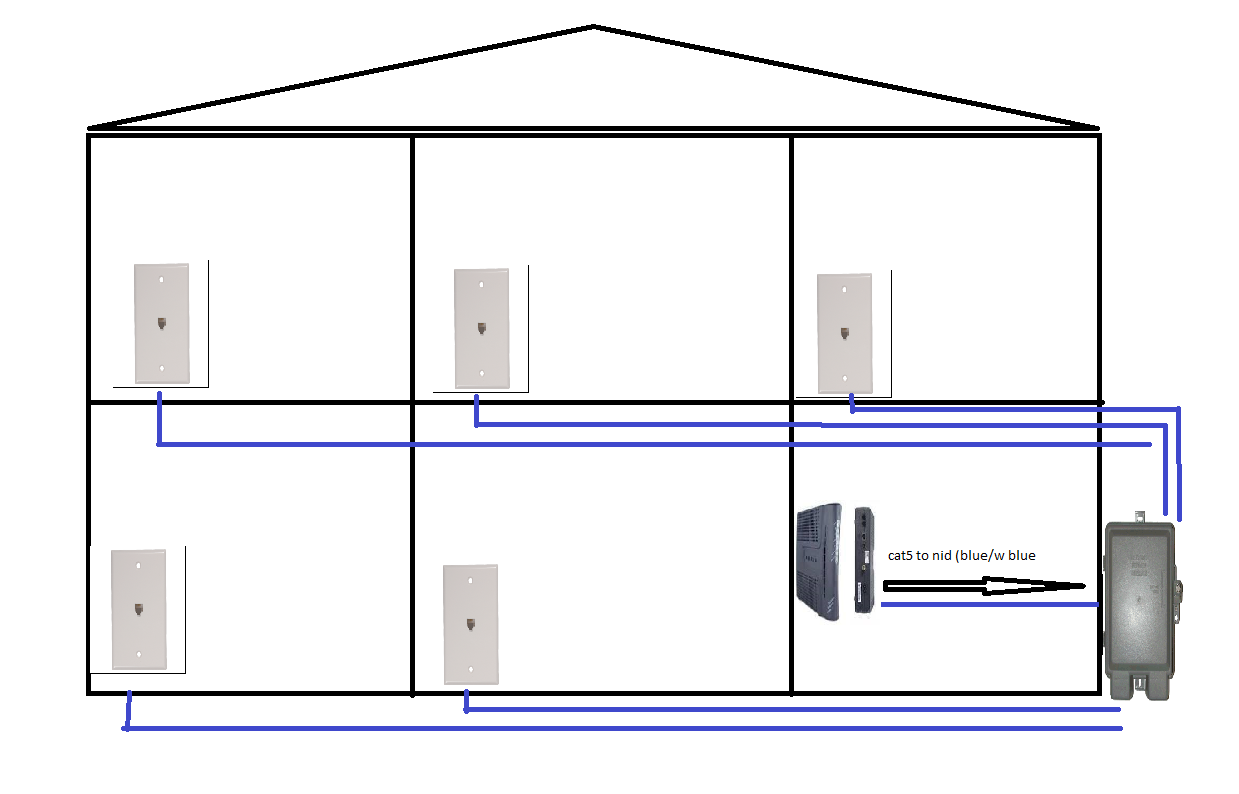
Fig 1 Homerun feed (preferred inside wiring (IW) phone network connection)


Instructions:
·         Connect the EMTA to the signal and power up.
·         Wait for all the light to be on, wait for line 1 to be on.
·         Plug the but-set on line1 located behind the EMTA.


·         Check and wait for the dial tone behind the EMTA or gateway
·         Activate dial tone by calling the IVR 1-800 number.
·         Check dial tone with your but set. (If no dial tone; continue to troubleshooting guide).
·         Run test by calling in/out from the EMTA or gateway.
·         If test went successfully continue with the following step below.
·         Here you can have two different ways to finish the installation (simple telephone network installation: base phone set straight connect to the EMTA and its station base around the house) or (advanced network: following the procedure that will continue next).
·         Run a cat5 wire from the room located the EMTA to the NID.
·         If no phone jack present. Install an rj11 jack and connect the blue wire to the new jack.


·         Connect the new jack to the EMTA using an RJ11 Modular Telephone cable.
·         Go to the NID and disconnect the NID from external cable (ASW) to isolate the phone network only to the inside network. (Fig 3 y 4)
·         Disconnect the ASW from the EBM and use the wire from the EBM (green /red) to connect to the cat5 (blue and white blue) refer to fig 6.
·         Connect all jacks that you wish to activate to the EBM (EBM hold up to four lines) Fig 4. For more lines to be activated follow the tutorial of “how to splice and connect IW using schlock “refer to fig 5.


(Fig 5) Proper procedure of how to splice a jack to a single feed.


(Fig 2) Inside wires connected to the NID.


(Fig 3) ASW identification.


(Fig 4) ASW identification and proper cut.


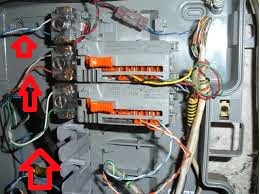
(Fig 6) Identification of most common part inside the NID.
·         Connect the test phone in each phone jack and check for dial tone.
·         Run test by calling in/out for each phone number.
·         While calling, listen for static, noise in the line, delay in the call, gap in the voice, dropping call, or ring too low or almost impossible to hear. (If one of these problem appear on the phone service. Refer to troubleshooting guide technician to aim for a better resolution).


(Problems of interference and attenuation
Two-wire copper circuits did not solve all the problems of long-distance telephony, however. As the number of lines grew, interference (or cross talk) from adjacent lines on the same crossarm of telephone pole became significant. It was found that transposing the wires by twisting them at specified intervals canceled the cross talk. ) telephone. (2014). In Encyclopaedia Britannica.


If alarm is present. Follow next steps
Today’s technology makes it easy for a non-expert to do the installation. Leader Security Companies are now using GSM Modules that connect their systems to cellular antennas to communicate with cell towers over wireless networks such as our cellular phones. That makes it a very independent system capable of receiving updates, proper calibration and call for emergency services; this type of technology does not need a landline as it used to need in the past. Also, it has a very reliable connectivity that is worth of its price (fig 7). However, there are cases when the expert is needed to proper wired an old alarm system.


(Fig 7) GSM Module for Alarm System (it eliminates the need of a land-line requirements)

Old system alarm work with plain line telephone service and they need to receive a dial tone in order to communicate with the emergency system such as 911 or police department.
So, this is our job. Make sure the alarm system has dial tone after a successful VoIP installation. This job is normally done by an alarm technician who has previously run the cable and leaves everything connected and working. In the other hand after we take over from another phone provider, we as technicians have to guarantee that all services remain as we found them before our visit. Additionally, it is very important to know the compatibility of this alarm with our new phone service. And further questions are needed to properly proceed with our installation.

Instructions for Wiring an Alarm Panel with VoIP.
·         Identify the wire that goes to the alarm panel by a tone/searching method. If no wiring existing or bad wire preexist. Follow the guide to proper wire the alarm panel.
·         Create a back feed this way (send dial tone to the rj31x using the cat3 green/red wires or the cat5 blue/white blue wires).
·         Connect to the tips 4 and 5 in the rj31x matching the picture below.
·         Take the second pair of wires to return the dial tone back to the NID.
·         Connect the following color black/yellow from the cat3 or orange/white orange from the cat5 to the tips 1 and 8 from the rj31x. Refer to fig 7, 8, and 11


(Fig 11) Proper Connection for Medical Alert Monitoring System

Additional Components
RJ31X


 (Fig 8) Proper Wiring for the Distribution rj31x


(Fig 9) Alarm Panel


(Fig 11) cat5 connected to the rj31x


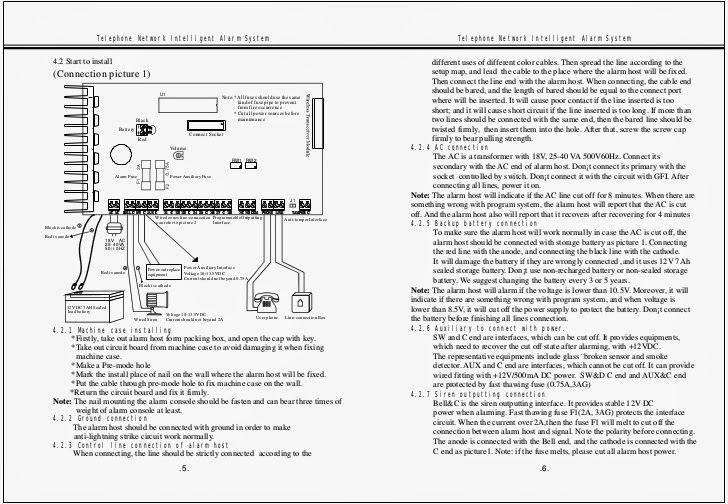
(Fig 10) Telephone Network Alarm System


The cat5 blue is the new wire that runs from the NID to the alarm panel were blue and orange wires are connected to 4-5 and 1-8 refer to fig 12

(Fig 12) pins 1-8
AutoChessInc©
Reviewed December 2014 ©

THIS INFORMATIVE MANUAL IS FOR SHARING OVER THE INTERNET;BUT REMEMBER TO INCLUDE THE AUTHOR PAGE AND THIS BACK LINK AS REFERENCE AND TO RESPECT THE PUBLISHER HONOR FOR HIS JOB


Reference:
VoIP. (2014). In Encyclopaedia Britannica. Retrieved from http://academic.eb.com/EBchecked/topic/1017653/VoIP
telephone. (2014). In Encyclopaedia Britannica. Retrieved from http://academic.eb.com/EBchecked/topic/585993/telephone